
Introduction
This article is based on a document from Albert Lee. Here you can download the original file:
Star 4 Calibration
– Link to the profile of Albert Lee in TalkTennis Forum
What you need:
- Hex keys in different sizes
- Slotted screwdriver
- A spring calibrator or a really good digital calibrator
- DC Multimeter (0–11 volt range) is good to have
Rough steps:
- Remove the cover (white shell)
- Turn on machine to warm up 1-2 hours
- Calibrate it
- Reassembling
Preparation
Remove the tension gripper
To remove the gripper you have just to pull the pin under the jaws:
When the pin is remove you can easily remove the jaws.
Remove racket turntable
Remove the screws on the middle of the turntable:
After that you can lift up the turntable and place it on the side.
Remove the cover
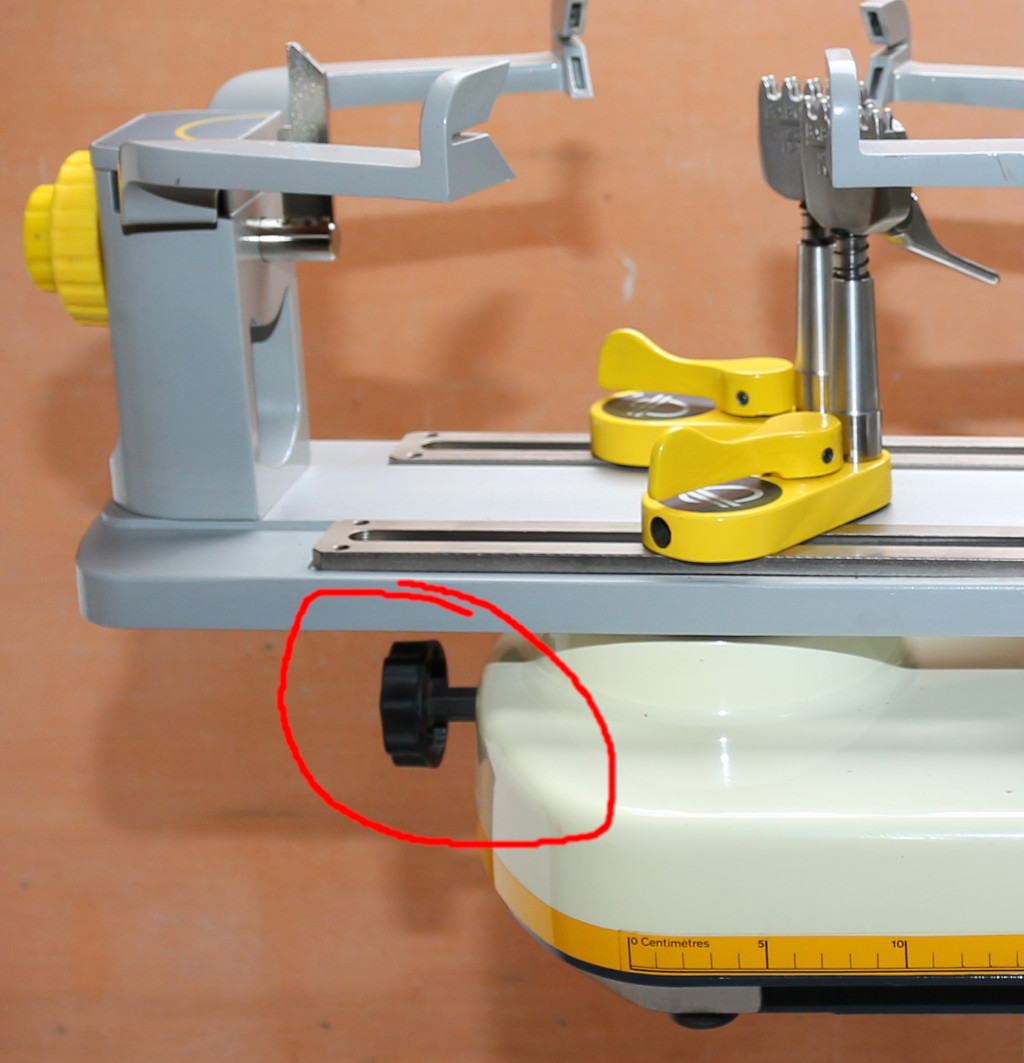
Remove table lock lever/screw:
Remove the screws on the bottom of the machine for the cover (should 4 cap screws).
After that, lift up the cover carefully, there is still a ribbon cable attached!
Reattach Parts
Reattach the following parts:
- Table lock lever/screw
- Turntable and tighten it!
- Tension Gripper (insert the pin)
Turn on
Now turn the machine on and wait 1-2 hours for warming up.
Calibration
Attach the Multimeter
Attach your DC Multimeter to the free pins (use alligator clips):
These pins are for attaching a DC voltmeter to perform the offset adjustment. Lower pin is negative voltmeter connector, upper pin is positive voltmeter connector.
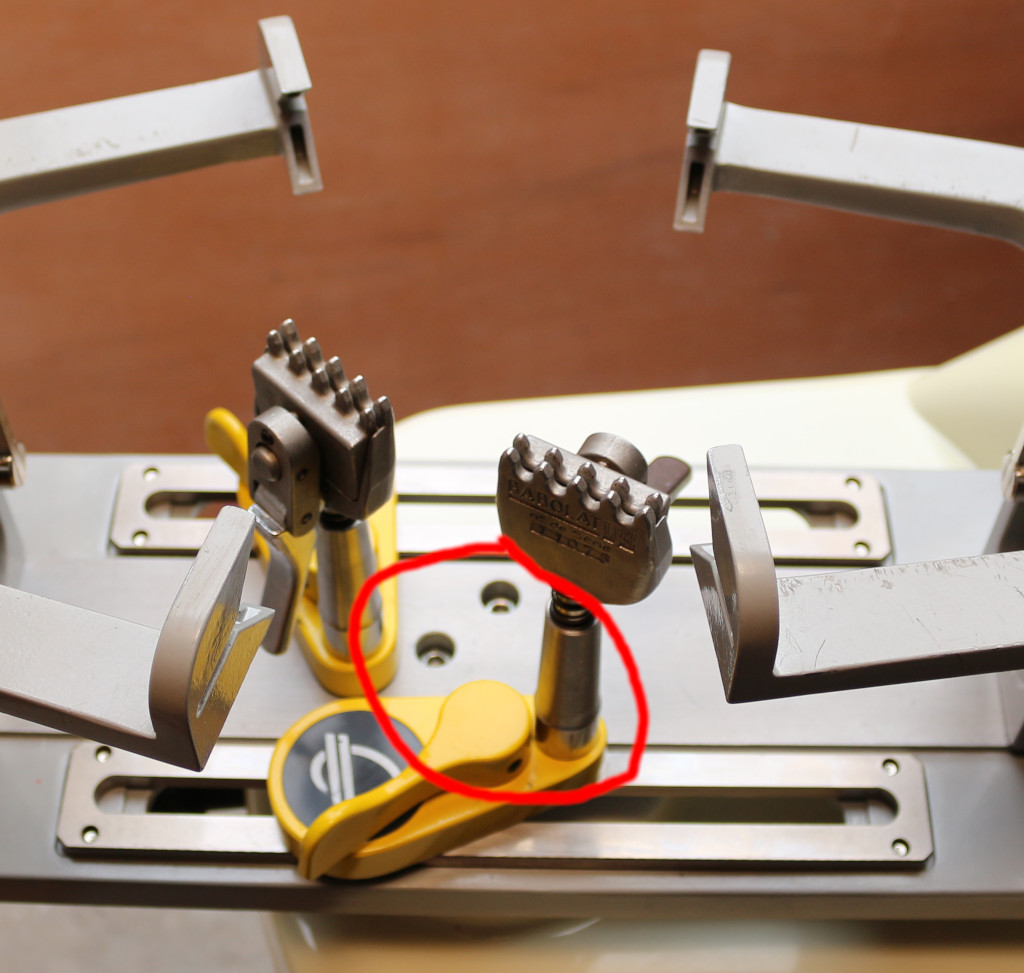
Attach the calibrator
You will need at least a spring calibrator that you trust to be true and accurate or use a really good digital calibrator. Screw the main support against the tower and attach there the calibrator:
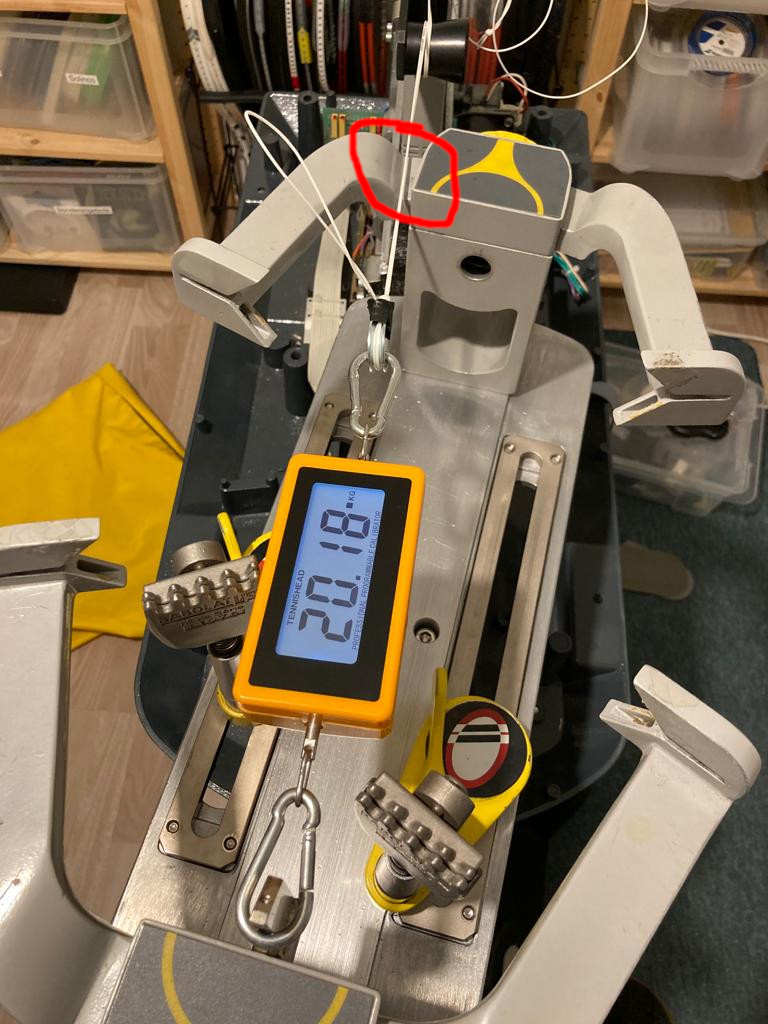
Make sure that the string does not touch anything. If you have adjusted the turntable lock it with the turntable lock!
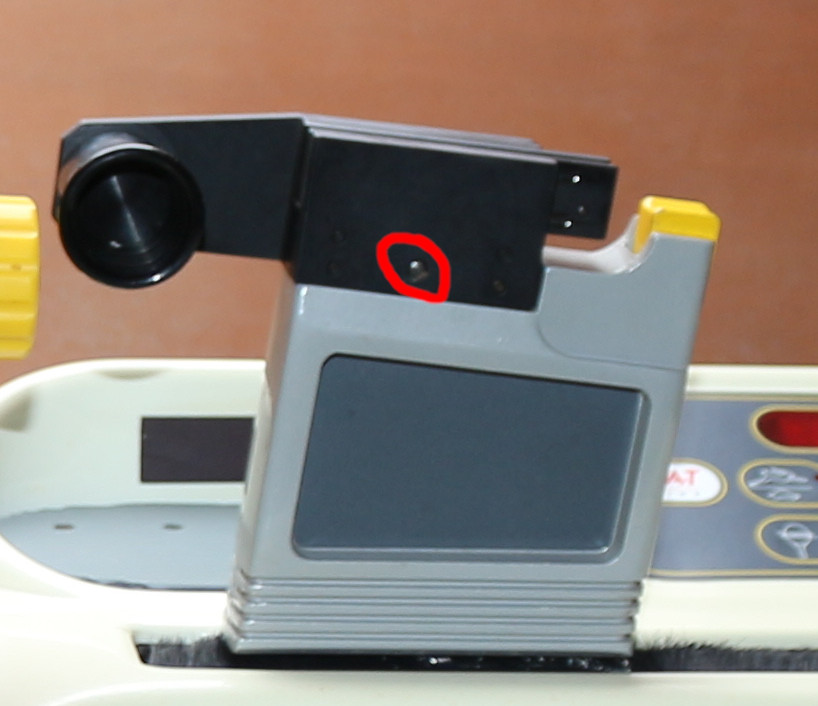
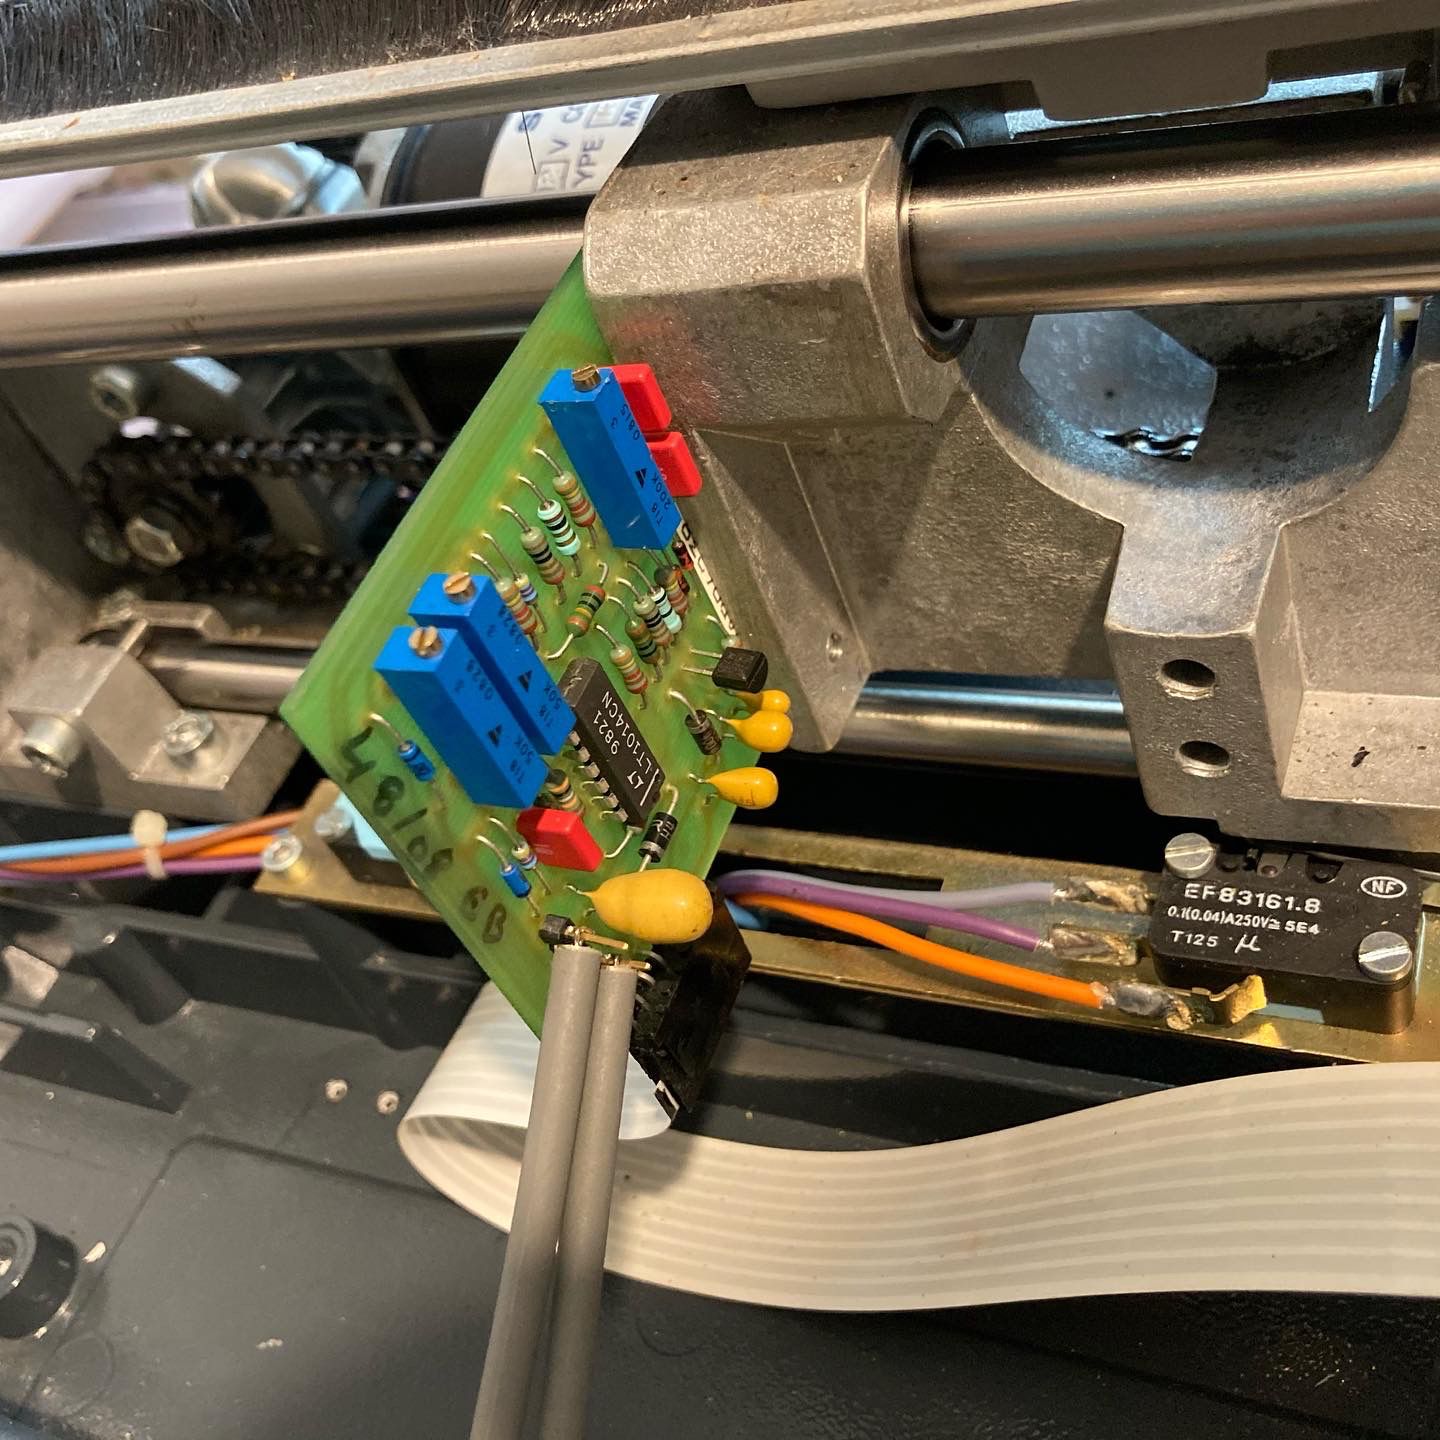
Look for 3 potentiometers on vertically circuit board mounted on tension head sub-assembly. The potentiometers will be yellow or blue in color about an inch long and each has a small brass colored adjustment screw.
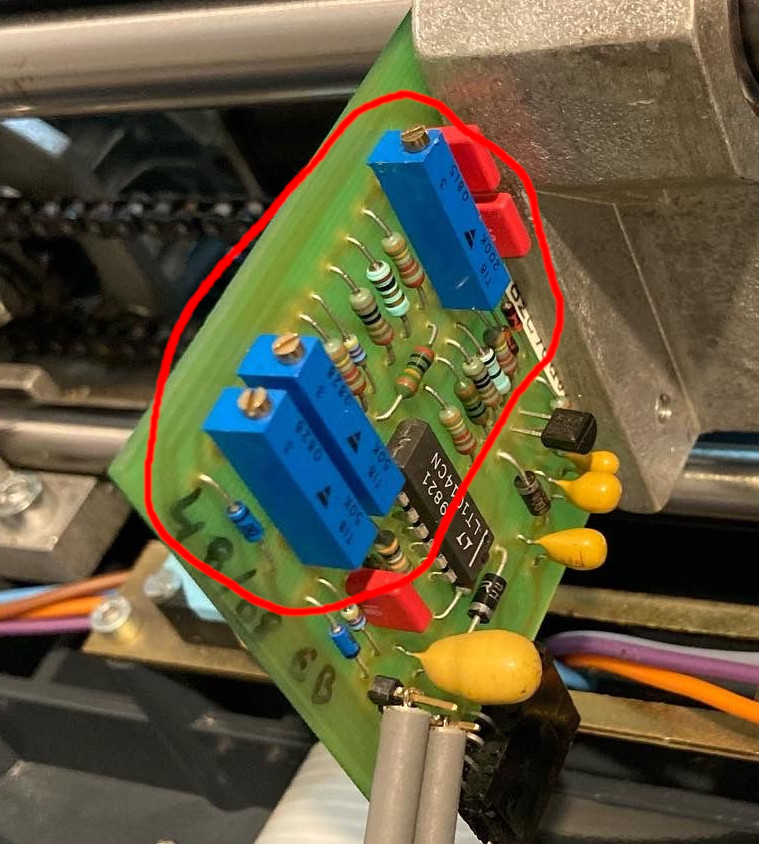
The three potentiometers are above and numbered from left to right as 3, 2, and 1.
- 3 is for gain or calibration
- 1 is for coarse offset
- 2 is for fine offset
Only adjust Gain (3) to set calibration. Gain (3) adjustment screw is located farthest from the normal stringer standing position. Offset adjustment (1) is located closest to stringer.
Set machine reference tension to 60 pounds. Using a spring calibrator, pull tension and note any difference. Remove tension and turn Gain (3) adjustment screw. I believe counter clockwise will increase pull and opposite will reduce machine pull. Re-pull, test, and adjust until you get 60 pounds on the spring calibrator.
Quick Offset adjustment: See two gold colored pins with black plastic base (see photo).
Connect DC Voltmeter (0-1 volt range). Connect negative Voltmeter lead to pin closest to
ribbon cable connector, positive Voltmeter lead to other gold pin. Adjust potentiometer 1 until
meter reads 0.9 VDC. Note changing calibration screws will change offset and vice versa so
you will need to adjust both (calibration and offset screws) until both read correctly.
You’re finished.
Remove the table lock, turntable, and tension jaws. Install cover and remaining parts.